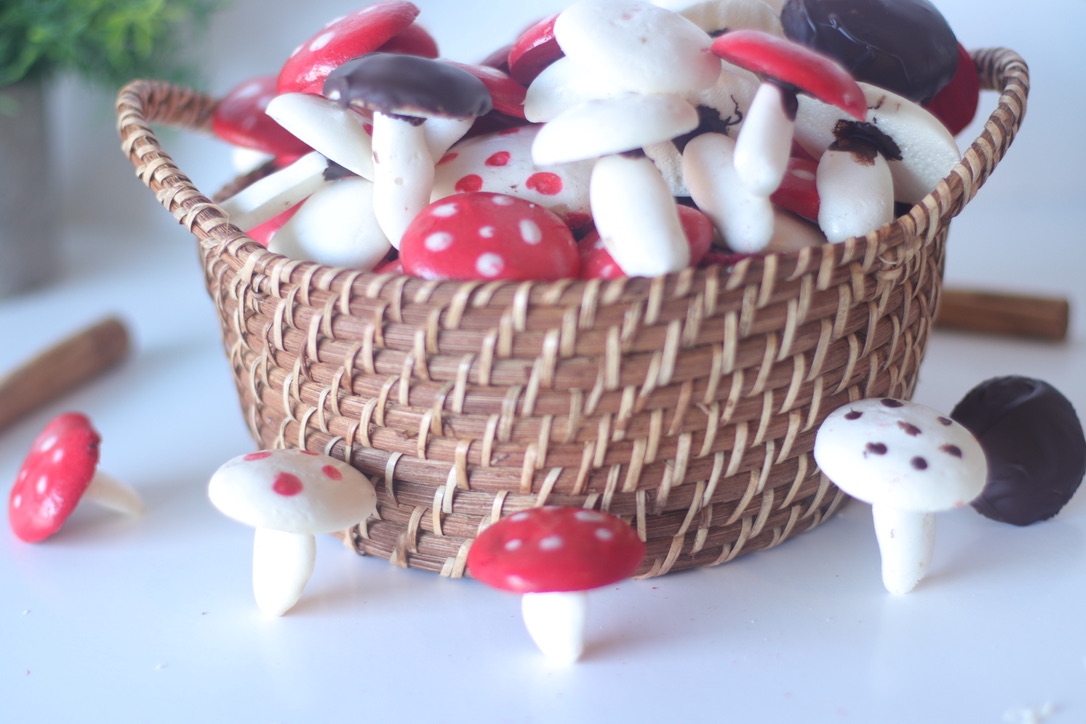
Vegan Meringue Mushrooms
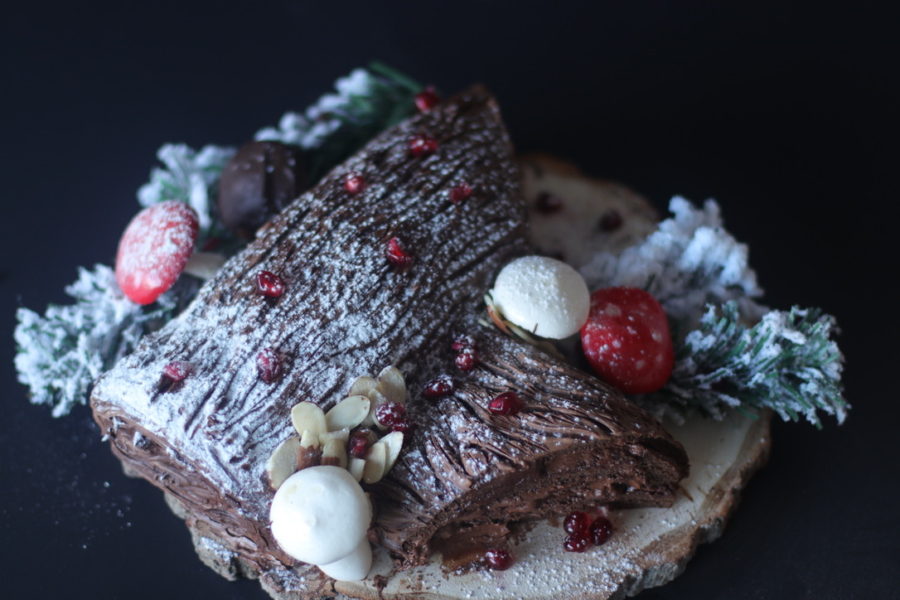
I love this time of the year. The holidays have a way to spark my creativity and these vegan meringue mushrooms are a great invitation for festivities. I used them to decorate my vegan yule log. Now, when I made them it was quite a lot and I was wondering what I was going to do with the rest of them. Well my nieces were there to the rescue. They enjoyed quite a bit of it and since it was their first time, they had an interesting description: one said “it tastes like cloud but it’s sweet” and the other said “It’s like a cookie but not really”. Well, either way they like it and I had to stop them at some point because it’s quite sweet.
Jump to RecipeWhat are meringue mushroom?
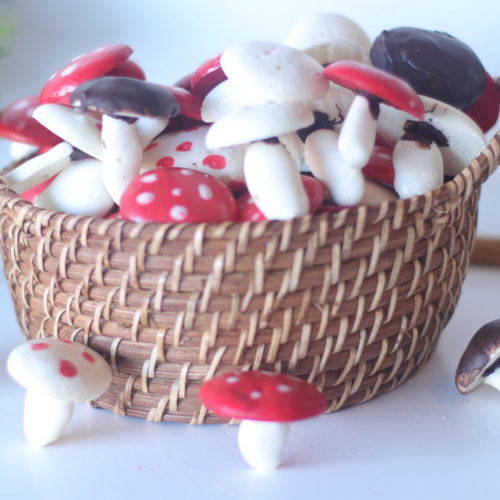
Meringue mushrooms, known as “champignons meringués” in French, are whimsical confections resembling mushrooms made from meringue. They are typically crafted by piping meringue into mushroom cap and stem shapes, then baked until crisp and lightly browned. These delightful treats are often used as decorations for cakes and desserts, adding a touch of elegance and charm to the presentation.
The Magic Ingredient:
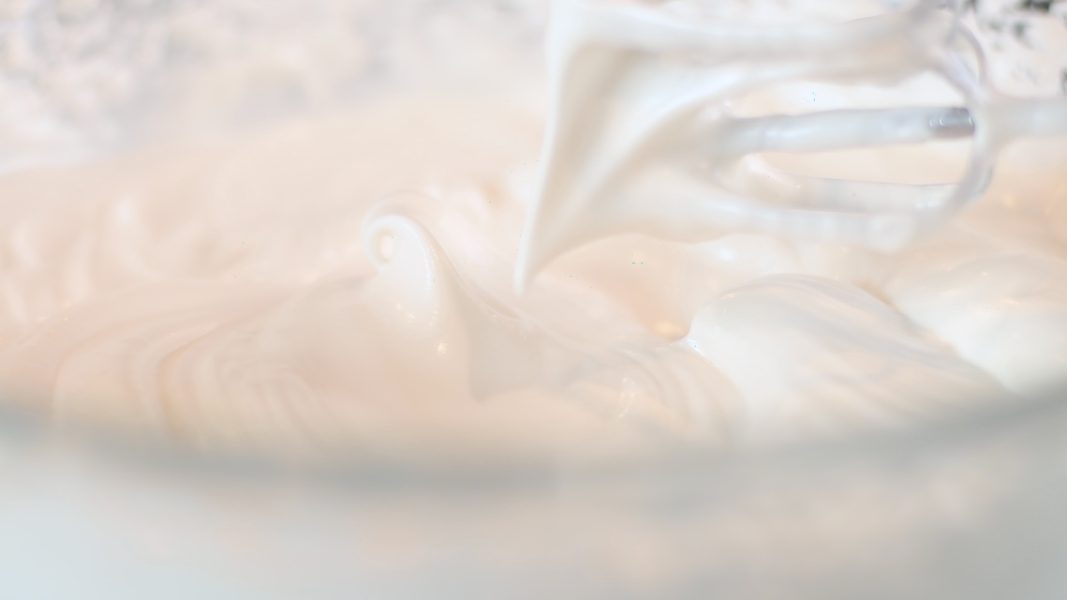
Now, traditional meringues are made with egg white, but here, we’ll use aquafaba, which is nothing but the liquid that comes from cooked beans in general. For this recipe, we’ll use liquid from a chickpeas can. Honestly, whoever discovered that aquafaba acts like egg white is a genius. Once aquafaba is beaten, it is exactly like egg white and actually also behave the same way in baking.
How to Make the Meringue
Pour the aquafaba in a mixing bowl, add the cream of tartar and mix with the hand mixer for about 5 minutes.
Add about a quarter of the sugar at a time and continue to mix until the meringue becomes glossy and when removing the hand mixer, sharp peaks form and hold. The meringue is ready.
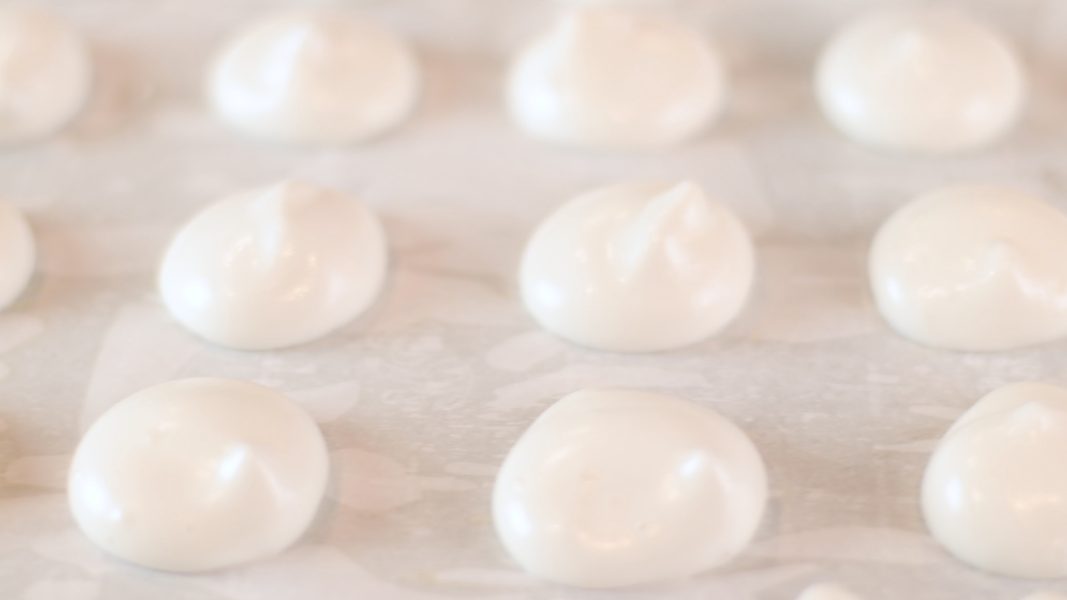
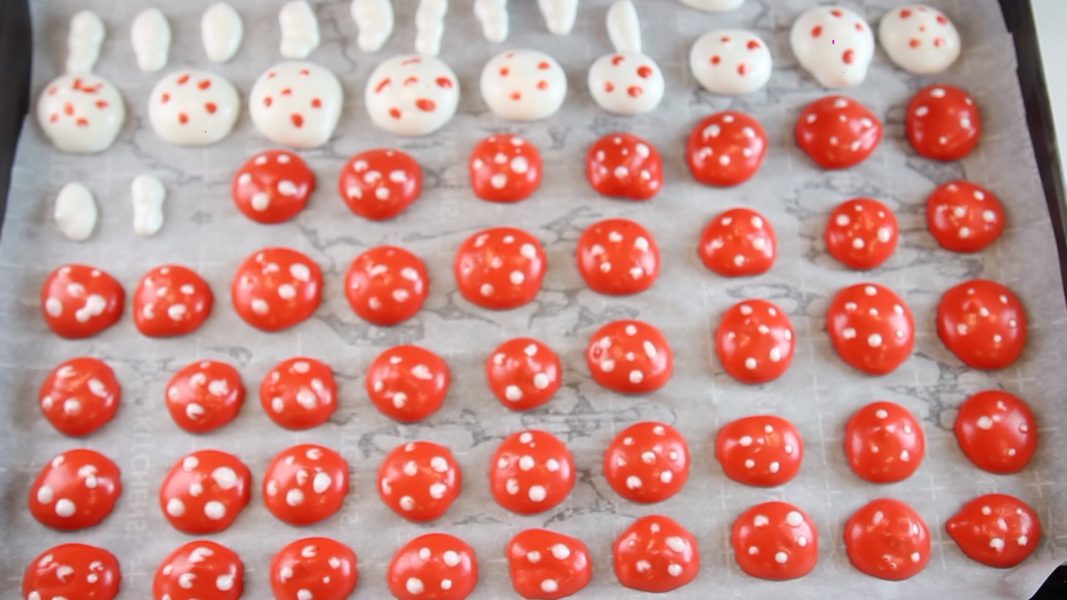
Pour two third of the mixture in a pipe bag (or ziploc bag) and open the tip. Line a large baking tray with parchment paper. Point the pipe bag vertically and gently pour a little bit of the meringue to form small disks. These will be the mushroom caps.
Then use the mixture to form small sticks, these will be the mushroom stems. Keep in mind we will need more stems than caps. Reserve some of the white meringue to decorate the red mushroom caps.
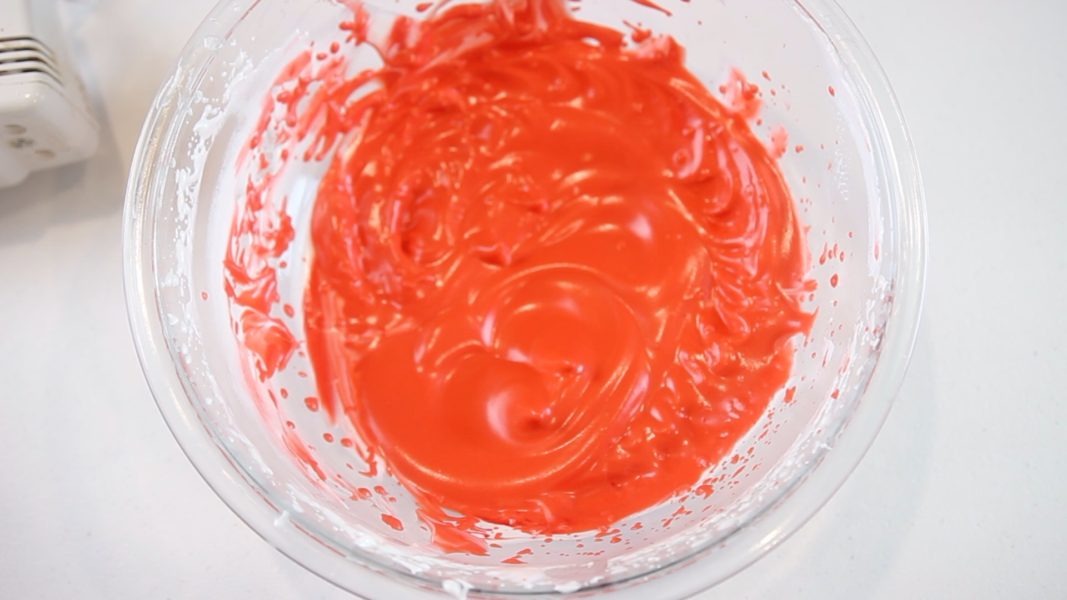
For the remaining third of the meringue, add the red food coloring and mix it with the hand mixer for a minute or so until the meringue becomes red. Then pour the red meringue in a pipe bag and repeat the same process to obtain the mushroom caps only.
Use a chopstick or anything with a thick point to decorate the red mushrooms with the RESERVED white meringue. The goal is to create a polka dot pattern on each red mushroom cap. Place the tray in the oven and bake for 90 minutes.
Vegan Meringue Mushrooms
Melt the chocolate by placing it in a bowl and on top of a container with hot water. Feel free to dip some of the mushroom caps in the melted chocolate to have brown mushrooms.
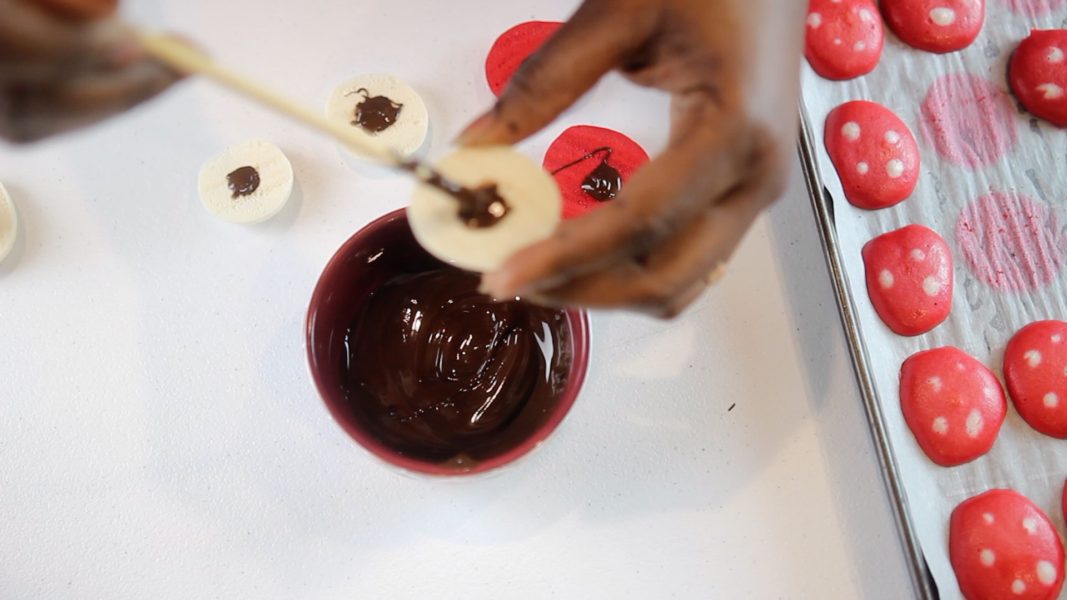
Use a chopstick or a small brush to coat the back of each mushroom cap with the melted chocolate and let them set in the fridge for about 3 to 5 minutes until the chocolate just begins to firm up. This will help the stems to glue better on the caps.
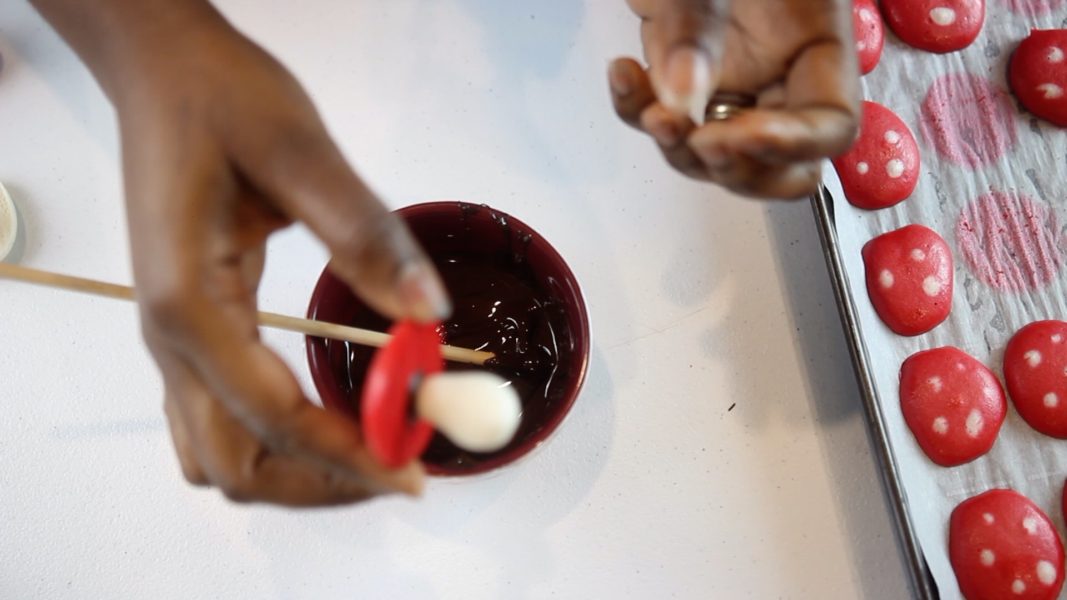
Remove the caps from the fridge and place the mushroom stems on each cap. These should hold easily. The meringue mushrooms are ready. Enjoy them as they are or use them to decorate desserts like my fancy Vegan Yule Log/Buche de Noel.
*The Mushroom Den earns a small commission if you make a purchase using any of the affiliate links listed on this post. We only suggest products we believe in, so hopefully you like them too.
Vegan Meringue Mushrooms
Equipment
- Hand Mixer
Ingredients
- 1 can Chickpeas Aquafaba
- 3/4 Cup Sugar
- 1/2 Tsp Vanilla Extract
- 1/4 Tsp Cream of Tartar Optional
- 2 Tsp Red food coloring
- 4 oz semi sweet chocolate
Instructions
- Preheat the oven at 210F.
Meringue
- Pour the aquafaba (liquid from the chickpea can) in a mixing bowl, add the cream of tartar and mix with the hand mixer for about 5 minutes.
- Add about a quarter of the sugar at a time and continue to mix until the meringue becomes glossy and when removing the hand mixer, sharp peaks form and hold. The meringue is ready.
- Pour two third of the mixture in a pipe bag (or ziploc bag) and open the tip.
- Line a baking tray with parchment paper.
- Point the pipe bag vertically and gently pour a little bit of the meringue to form small disks. These will be the mushroom caps.
- Then use the mixture to form small sticks, these will be the mushroom stems. Keep in mind we will need more stems than caps. Reserve some of the white meringue to decorate the red mushroom caps.
- For the remaining third of the meringue, add the red food coloring and mix it with the hand mixer for a minute or so until the meringue becomes red. Then pour the red meringue in a pipe bag and repeat the same process to obtain the mushroom caps only.
- Use a chopstick or anything with a thick point to decorate the red mushrooms with the RESERVED white meringue. The goal is to create a polka dot pattern on each red mushroom cap.
- Place the tray in the oven and bake for 90 minutes.
Meringue Mushrooms
- Melt the chocolate by placing it in a bowl and on top of a container with hot water.
- Feel free to dip some of the mushroom caps in the melted chocolate to have brown mushrooms.
- Use a chopstick or a small brush to coat the back of each mushroom cap with the melted chocolate and let them set in the fridge for about 3 to 5 minutes until the chocolate just begins to firm up. This will help the stems to glue better on the caps.
- Remove the caps from the fridge and place the mushroom stems on each cap. These should hold easily. The meringue mushrooms are ready. Enjoy them as they are or use them to decorate desserts like my fancy Vegan Yule Log/Buche de Noel.